Circular Saw Edge Guide
Making Rip Cuts with Your Circular Saw is Easy with this Jig.
원형톱 가이드
이 지그를 사용하면 원형톱으로 립 컷을 쉽게 만들 수 있습니다.
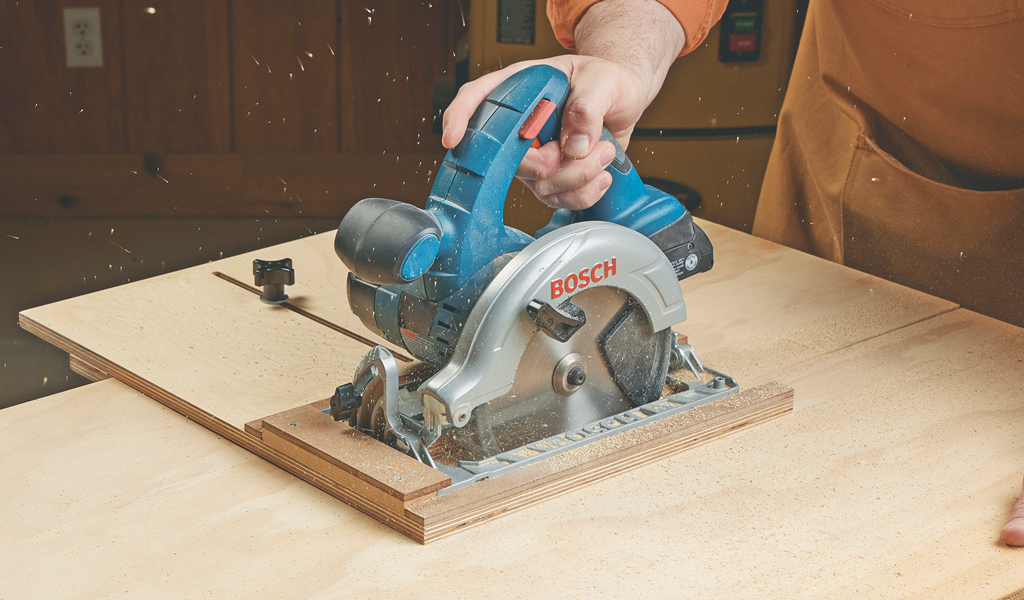
원형톱으로 직선으로 자르는 것은 항상 쉬운 일이 아닙니다. 이 핸드메이드 가이드를 만든 후에는 일관된 립과 크로스컷을 쉽게 할 수 있습니다.
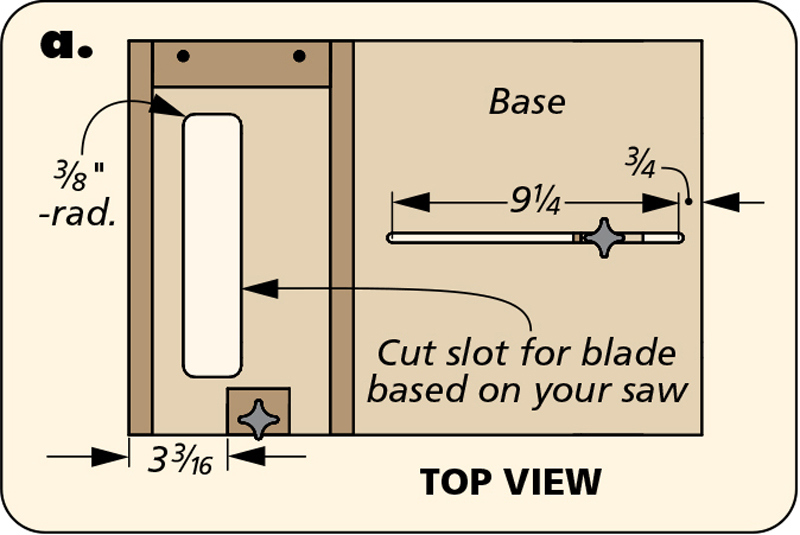
합판 베이스. 이 가이드의 베이스는 1⁄2인치 두께의 합판으로 제작합니다. 가이드는 원형톱 베이스보다 2인치 더 넓어야 하며 합판 베이스의 컷아웃은 톱의 컷아웃과 일치해야 합니다. 베이스에 긴 슬롯을 만들면 필요한 절단 너비에 따라 아래의 펜스를 조정할 수 있습니다. 베이스를 마무리하려면 펜스 키를 위해 바닥에 1⁄8인치 깊이의 홈 두 개를 가공합니다. 이 홈은 베이스 끝에서 잘라낸 부분까지 이어집니다.
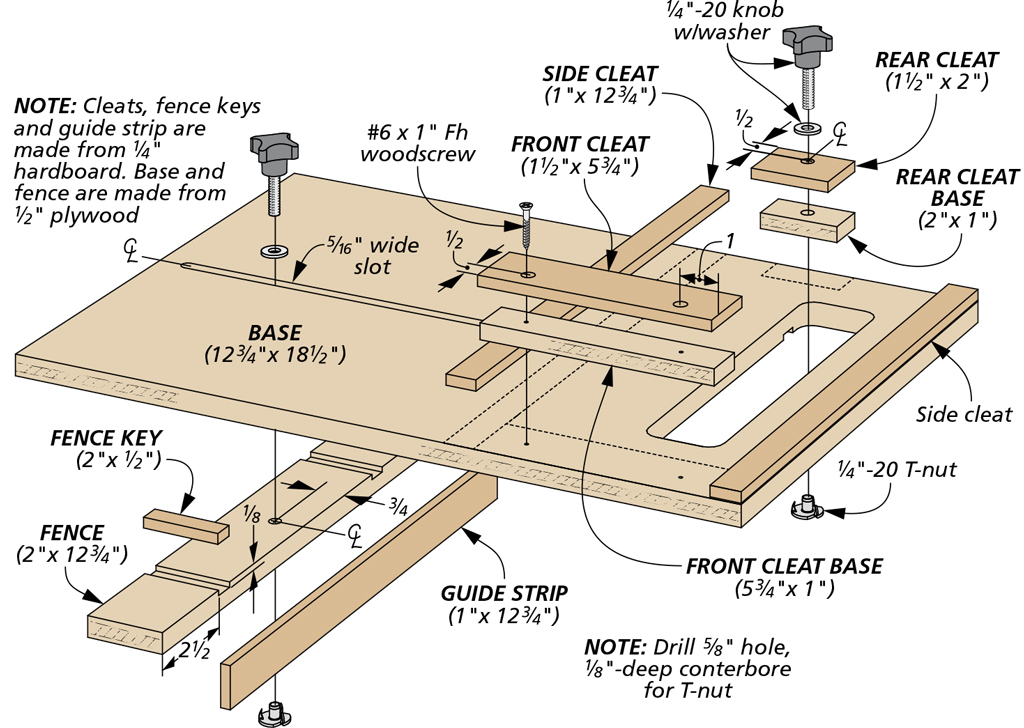
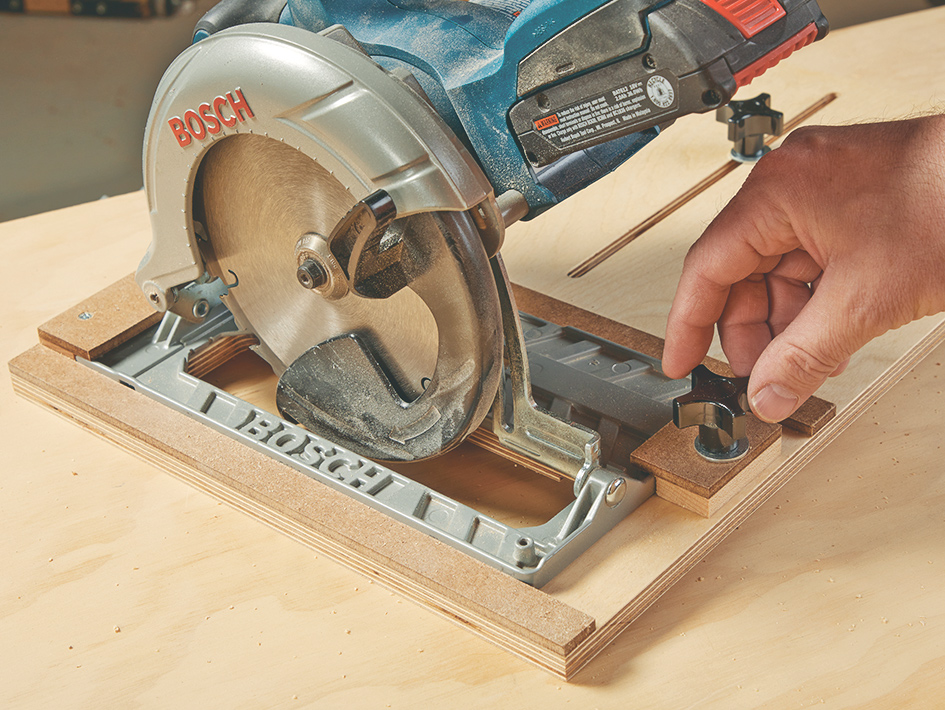
Securing Cleats. The cleats here frame the saw, keeping it in place while you make your cut. Measure out where the two side cleats need to be for your saw’s base and attach them. The front of your saw base will slip underneath the hardboard lip of the front cleat while the rear cleat, held in place with a threaded knob and T-nut, can then be tightened down to secure the back of the saw. The base of each cleat is simply made from scrap to match the height of the saw base.
Fence Guide. Finally, add a 2" plywood fence with two grooves in the bottom for the fence keys. A guide strip is added for a smoother surface to ride against the piece while cutting. The keys keep the fence parallel to the blade, and as long as the fence stays flat against the workpiece, your cuts will stay straight.
클리트 고정. 여기의 클리트는 톱을 프레임화하여 절단하는 동안 톱을 제자리에 고정합니다. 톱 베이스에 두 개의 측면 클리트가 있어야 하는 위치를 측정하여 부착합니다. 톱 베이스의 앞면은 앞 클리트의 하드보드 립 아래로 미끄러지고 나사산 노브와 T 너트로 제자리에 고정된 뒷면 클리트는 조여서 톱 뒷면을 고정할 수 있습니다. 각 클리트의 베이스는 톱 베이스의 높이와 일치하도록 간단히 스크랩으로 만들어집니다.
펜스 가이드. 마지막으로 펜스 키를 위한 바닥에 홈이 두 개 있는 2인치 합판 펜스를 추가합니다. 가이드 스트립을 추가하여 절단하는 동안 조각에 닿을 수 있는 더 매끄러운 표면을 만듭니다. 키는 펜스를 톱날과 평행하게 유지하고, 펜스가 작업물에 평평하게 유지되는 한 절단이 직선으로 유지됩니다.
The only limit on cutting capacity is the size of the base. This version can make up to 10” rip cuts.
절단 작업의 최대 폭은 베이스의 크기입니다. 이 버전은 최대 10인치 립 절단을 할 수 있습니다.
 각도 절단기 필수 지그
 다기능 원형톱 슬라이딩 지그


