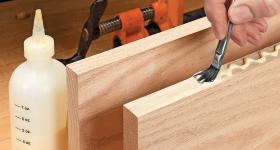
판재 집성할때 딴혀쪽매라는 결구 방법을 많이 사용합니다.
아마 많은 분들이 도미노나 비스켓을 사용하리라 생각됩니다.
저도 평소에는 도미노나 비스켓을 거의 사용하지 않지만 판재 집성시에는 쪽매를 직접 만들거나 비스켓을 종종 사용합니다.
테이블쏘로 홈을 가공하고 끼워 넣을 쪽매를 만들때 3mm 가공을 하려면 상당히 위험합니다.
폭이 넓은 쪽매일 경우에는 날물의 높이가 높아지기 때문에 더욱 위험하죠.
역시 서양 우드워커들은 똑똑한것 같습니다.
쪽매를 저렇게 만들 생각은 저도 하지 못했네요~
그 무엇보다도 안전이 제일입니다.
Super Strong Miters
A miter joint looks great but isn’t the strongest option. But you can strengthen your miter joints with this easy table saw technique.
강력한 쪽 짜임
촉 짜임은 좋아 보이지만 가장 강력한 옵션은 아니다. 하지만 여러분은 이 쉬운 테이블 톱 기술로 촉 짜임을 강화할 수 있습니다.
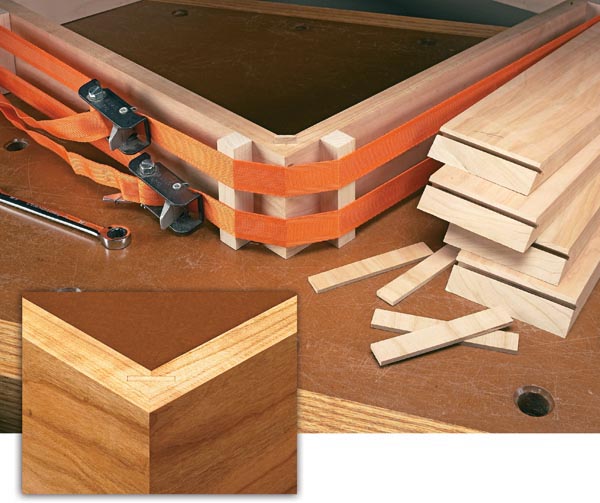
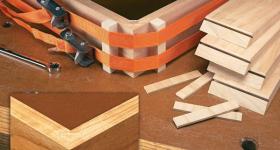
Tightly mitered corners on a box or case look great. But unfortunately, when it comes to assembly, miter joints have a couple drawbacks. First, keeping the mitered faces aligned during the glueup can be difficult. And even if you succeed here, the porous end grain of the miters makes for a pretty weak glue joint. Well, a good solution for both of these problems is to add a spline across the miter joint. A spline that’s only as wide as a saw kerf can keep the miters perfectly aligned during assembly. And it adds both mechanical and gluing strength to the joint.
상자나 케이스에 촉이 촘촘히 박힌 모서리가 멋져 보입니다. 하지만 불행히도, 조립에 관한 한, 외부에 촉을 넣은 짜임은 몇 가지 단점이 있습니다. 첫째, 글루업 중에 얼룩진 면을 정렬하는 것은 어려울 수 있습니다. 여기서 성공한다 하더라도, 촉의 다공성 끝의 알갱이는 상당히 약한 접착제 접합부를 만듭니다. 자, 이 두 가지 문제에 대한 좋은 해결책은 접합부 전체에 스플라인을 추가하는 것입니다. 톱니바퀴 정도의 스플라인만 있으면 조립 시 접합부를 완벽하게 정렬할 수 있습니다. 그리고 그것은 조립된 부분에 기계적 힘과 접착력을 더해줍니다.
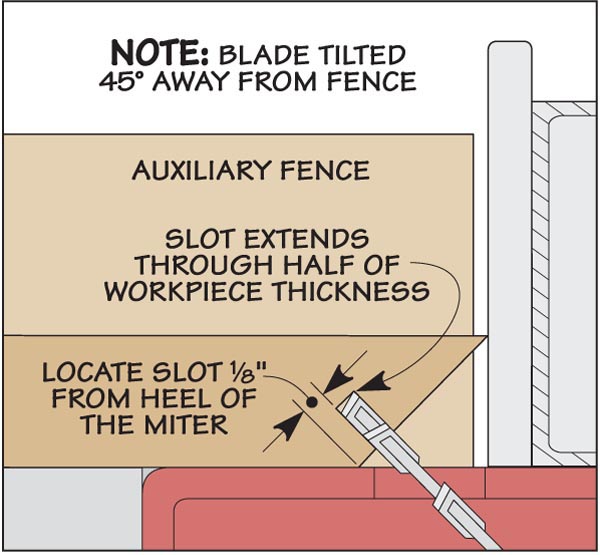
Cutting miters on the workpieces is where you start the job. Once this is done, there are two steps on the table saw to adding a spline to the joint. The first is to cut a pair of matching slots in the mitered faces. The second is to make a spline that fits the slots and connects the two halves of the joint. Before I talk about cutting the slots, take a quick look at the drawing. Here, you’ll see not only how the slot is cut but also where to place the groove and how deep to make it. I place the groove in the “heel” of the miter — about 1⁄8” from the edge in 3⁄4“-thick stock. This is the thickest part of the mitered face and it allows you to cut a deep slot and use a wide spline. But a good rule of thumb is to not extend the slot through more than about half the thickness of the workpiece.
공작물의 잘라 연귀면을 만드는 것은 여러분이 일을 시작하는 곳입니다. 이 작업이 완료되면 테이블 톱에는 조인트에 스플라인을 추가하는 두 가지 단계가 있습니다. 첫 번째는 얼룩진 면의 일치하는 슬롯을 절단하는 것입니다. 두 번째는 슬롯에 맞고 조인트의 두 반쪽을 연결하는 스플라인을 만드는 것입니다. 슬롯을 자르는 것에 대해 이야기하기 전에, 그림을 잠깐 보세요. 여기에서는 슬롯의 절단 방법뿐만 아니라 홈을 어디에 배치해야 하는지, 홈을 얼마나 깊이 만들어야 하는지 볼 수 있습니다. 저는 홈을 미터의 "뒤꿈치"에 3½인치 두께의 육수로 가장자리로부터 약 1½인치 떨어진 곳에 놓습니다. 이것은 연귀 면 중 가장 두꺼운 부분이며 깊은 슬롯을 자르고 넓은 스플라인을 사용할 수 있습니다. 그러나 슬롯을 공작물 두께의 약 절반 이상으로 확장하지 않는 것이 좋습니다.
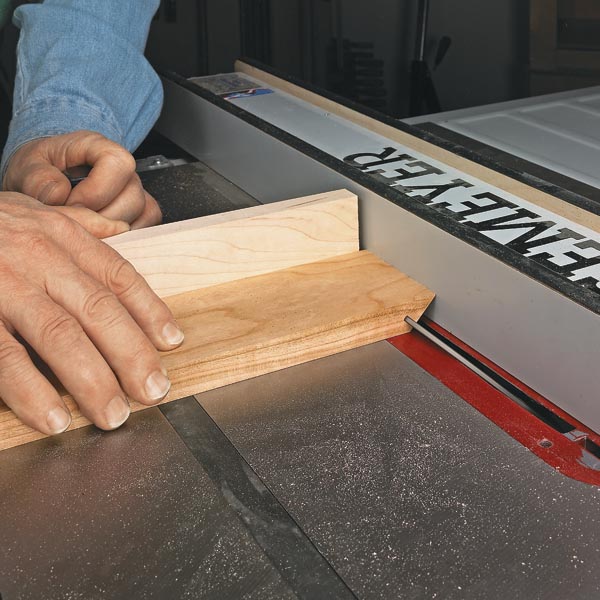
The rip fence is used to locate the slot at the same spot in each mitered face. The distance between the blade and the rip fence determines its position. The tip of the miter simply slides along the fence as you make the cut. With the blade adjusted and the fence locked in position, you’re ready to cut the grooves. When cutting the grooves in narrow pieces, I use the miter gauge with an auxiliary fence to feed the workpiece and back up the cut. You want the slots to be perfectly aligned across the two mitered faces. The key to this is to make certain the workpiece is flat on the saw table and the tip of the miter stays in contact with the rip fence.
리프 펜스는 각 얼룩진 면의 동일한 지점에 슬롯을 배치하는 데 사용됩니다. 칼날과 리프 펜스 사이의 거리가 위치를 결정합니다. 미터의 끝은 당신이 베는 동안 울타리를 따라 미끄러지기만 합니다. 날을 조정하고 울타리를 제자리에 고정시키면 홈을 자를 준비가 된 것입니다. 홈을 좁게 절단할 때는 보조 펜스가 달린 미터 게이지를 사용하여 공작물을 이송하고 절단을 백업합니다. 슬롯이 두 개의 연귀 면 전체에 걸쳐 완벽하게 정렬되도록 해야 합니다. 이를 위해서는 공작물이 톱 테이블 위에 평평하고 미터의 끝이 리프 펜스와 접촉하도록 하는 것이 중요합니다.
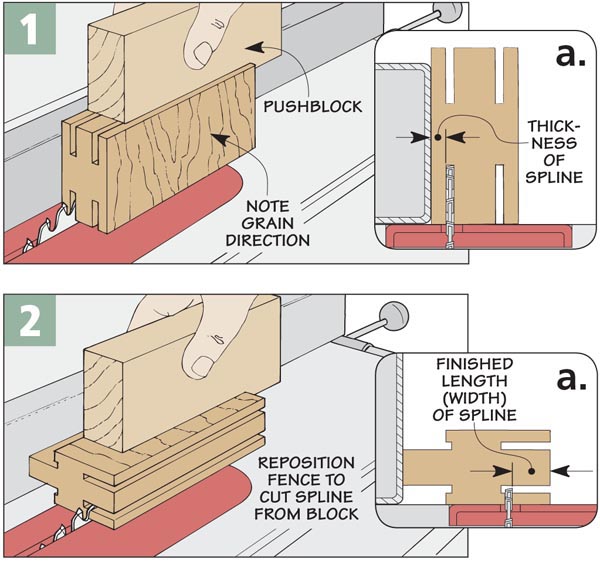
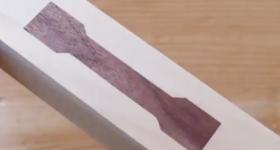
For narrower, hardwood assemblies, I use solid-wood “crossgrain” splines. The easiest way to make a hardwood spline is to simply rip a thin strip from a board. But now imagine putting a lot of stress on a miter joint assembled with a thin, long-grain spline. The spline would likely split along the grain and the joint would come apart. The best way to make a hardwood spline is shown in the drawings at right. This technique for cutting crossgrain splines from a short scrap is just a little more involved but the result has a couple of big advantages. Since the grain of the spline is running across the joint, there’s no chance of the spline splitting and the joint failing. A second benefit is appearance. The exposed end of the crossgrain spline matches the grain of the mitered pieces
더 좁고 단단한 목재 조립품의 경우, 솔리드우드 "크로스그레인" 스플라인을 사용합니다. 단단한 나무 스플라인을 만드는 가장 쉬운 방법은 판자의 얇은 스트립을 찢는 것입니다. 하지만 이제 얇고 긴 알갱이로 조립된 미터 관절에 많은 스트레스를 준다고 상상해 보세요. 곡식을 따라 스플라인은 갈라지고 이음매는 갈라질 것 같습니다. 하드우드 스플라인을 만드는 가장 좋은 방법은 오른쪽 그림에 나와 있습니다. 짧은 파편에서 교차 곡선의 스플라인을 절단하는 이 기술은 조금 더 많이 포함되지만, 결과는 두 가지 큰 장점을 가지고 있습니다. 스플라인의 알갱이가 이음매에 걸쳐 흐르고 있기 때문에 스플라인의 갈라짐과 이음매의 고장 가능성이 전혀 없습니다. 두 번째 이점은 외모입니다. 십자 곡선의 노출된 끝은 진드기 조각의 알갱이와 일치합니다.

