제목 그대로 공간 활용 효율을 높인 루터 테이블인 것 같습니다.
작업장의 공간이 넉넉하지 못하다면 한번 만들어 써 볼 만한 아이디어네요.

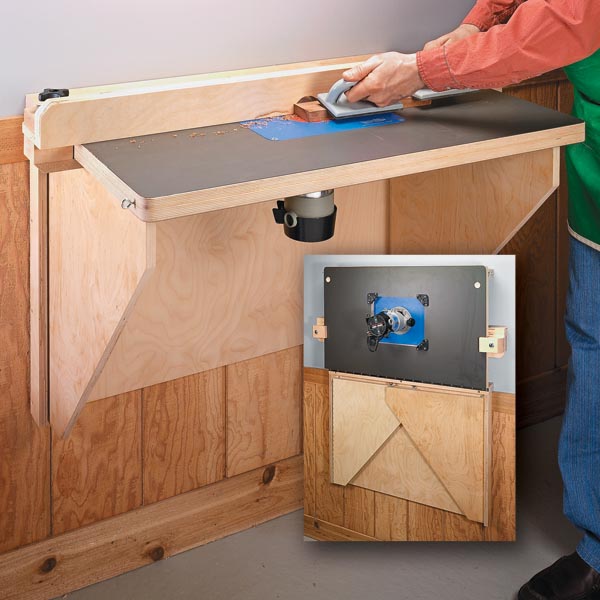
Like many woodworkers, space is at a premium in my garage workshop. My woodworking has to share the same space as the family car. I solved part of the problem by building the fold-up router table you see here. Its large worksurface provides plenty of support for any size workpiece. But the best part is, it folds up against the wall to provide extra room to work when needed.
많은 목공인들처럼, 내 차고 작업장의 공간은 프리미엄 입니다. 내 목공작업은 패밀리 카와 같은 공간을 공유해야 합니다. 저는 여기 보이는 접이식 라우터 테이블을 만들어서 문제의 일부를 해결했습니다. 큰 작업면은 어떤 크기의 공작물에도 충분한 지원을 제공합니다. 하지만 가장 좋은 점은, 필요할 때 일을 할 수 있는 여분의 공간을 제공하기 위해 벽에 기대어 접힌다는 것입니다.

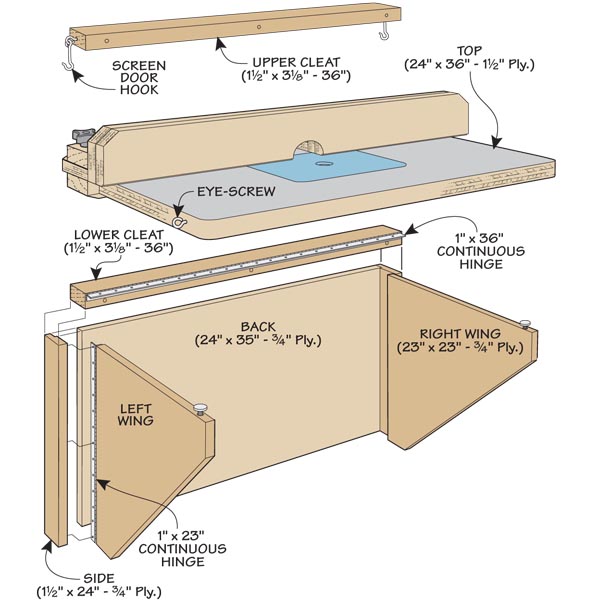
The drawing at left gives you an idea of how it all works. The support structure with the folding wings is sized to fit my router table. The length of the two cleats (upper and lower) matches the width of the router table.
왼쪽의 그림을 보면 모든 것이 어떻게 작동하는지 알 수 있습니다. 접이식 날개가 있는 지지 구조물은 라우터 테이블에 맞게 크기가 조정됩니다. 두 클리트의 길이(위 및 아래)는 라우터 테이블의 너비와 일치합니다.

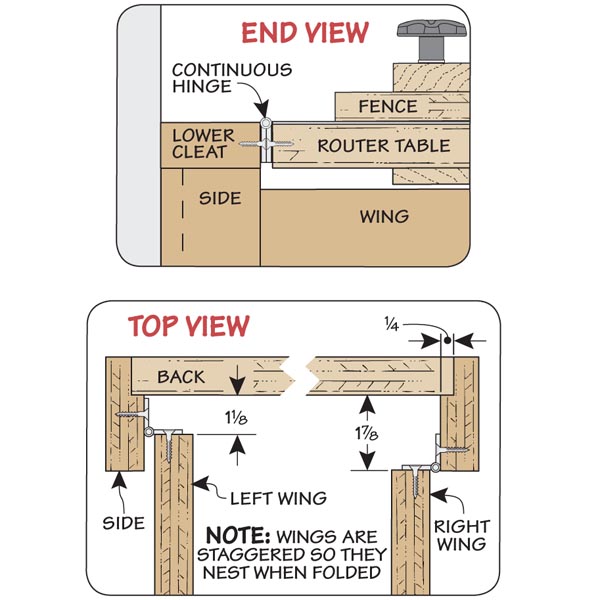
You can start with the back panel and add the two side pieces that hold the folding wings. The wings are attached to the sides with a continuous hinge. I staggered mine so the wings would fold fl at, one on top of the other (Top View). Next, I mounted the lower cleat to the back and sides then attached the top to it with a hinge.
후면 패널부터 시작하여 접이식 날개를 고정하는 두 개의 측면 피스를 추가할 수 있습니다. 날개는 연속 경첩으로 측면에 부착됩니다. 나는 날개가 평평하게 접히도록 내 날개를 비틀었고 다음으로, 나는 뒤쪽과 측면에 하부 클릿을 장착하고 그 위에 힌지로 탑을 부착했습니다.

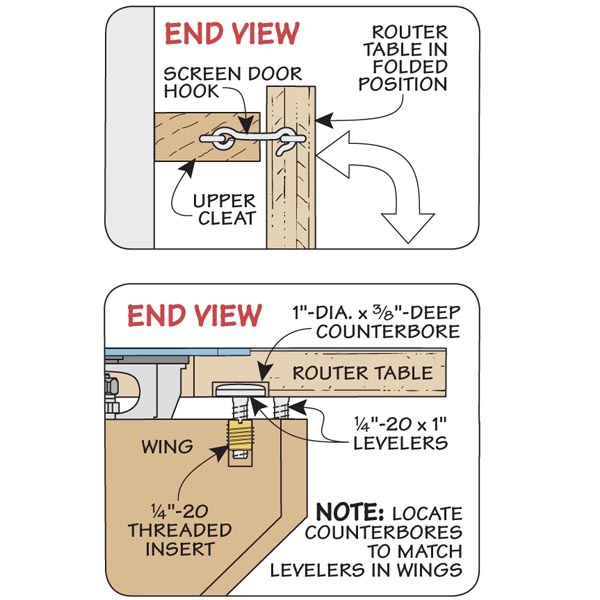
To locate the upper cleat, flip the top up against the wall. Then to hold the top in place against the wall, add the screen door hooks. Finally, lower the top to locate the counterbores underneath for the leveling hardware.
위쪽 클릿을 찾으려면 위쪽을 벽에 대고 뒤집습니다. 그런 다음 상단을 벽에 대고 고정하려면 스크린도어 후크를 추가합니다. 마지막으로, 상단을 아래로 내려 레벨링 하드웨어의 아래 카운터 보어를 찾습니다.
 [드릴프레스] 각도 지그
 [드릴프레스] 길다란 부재를 가공하기 위한 드릴프레스 지그


